FD40-H02R, FD40-H03R | Anderic Ceiling Fan Receiver User Guide
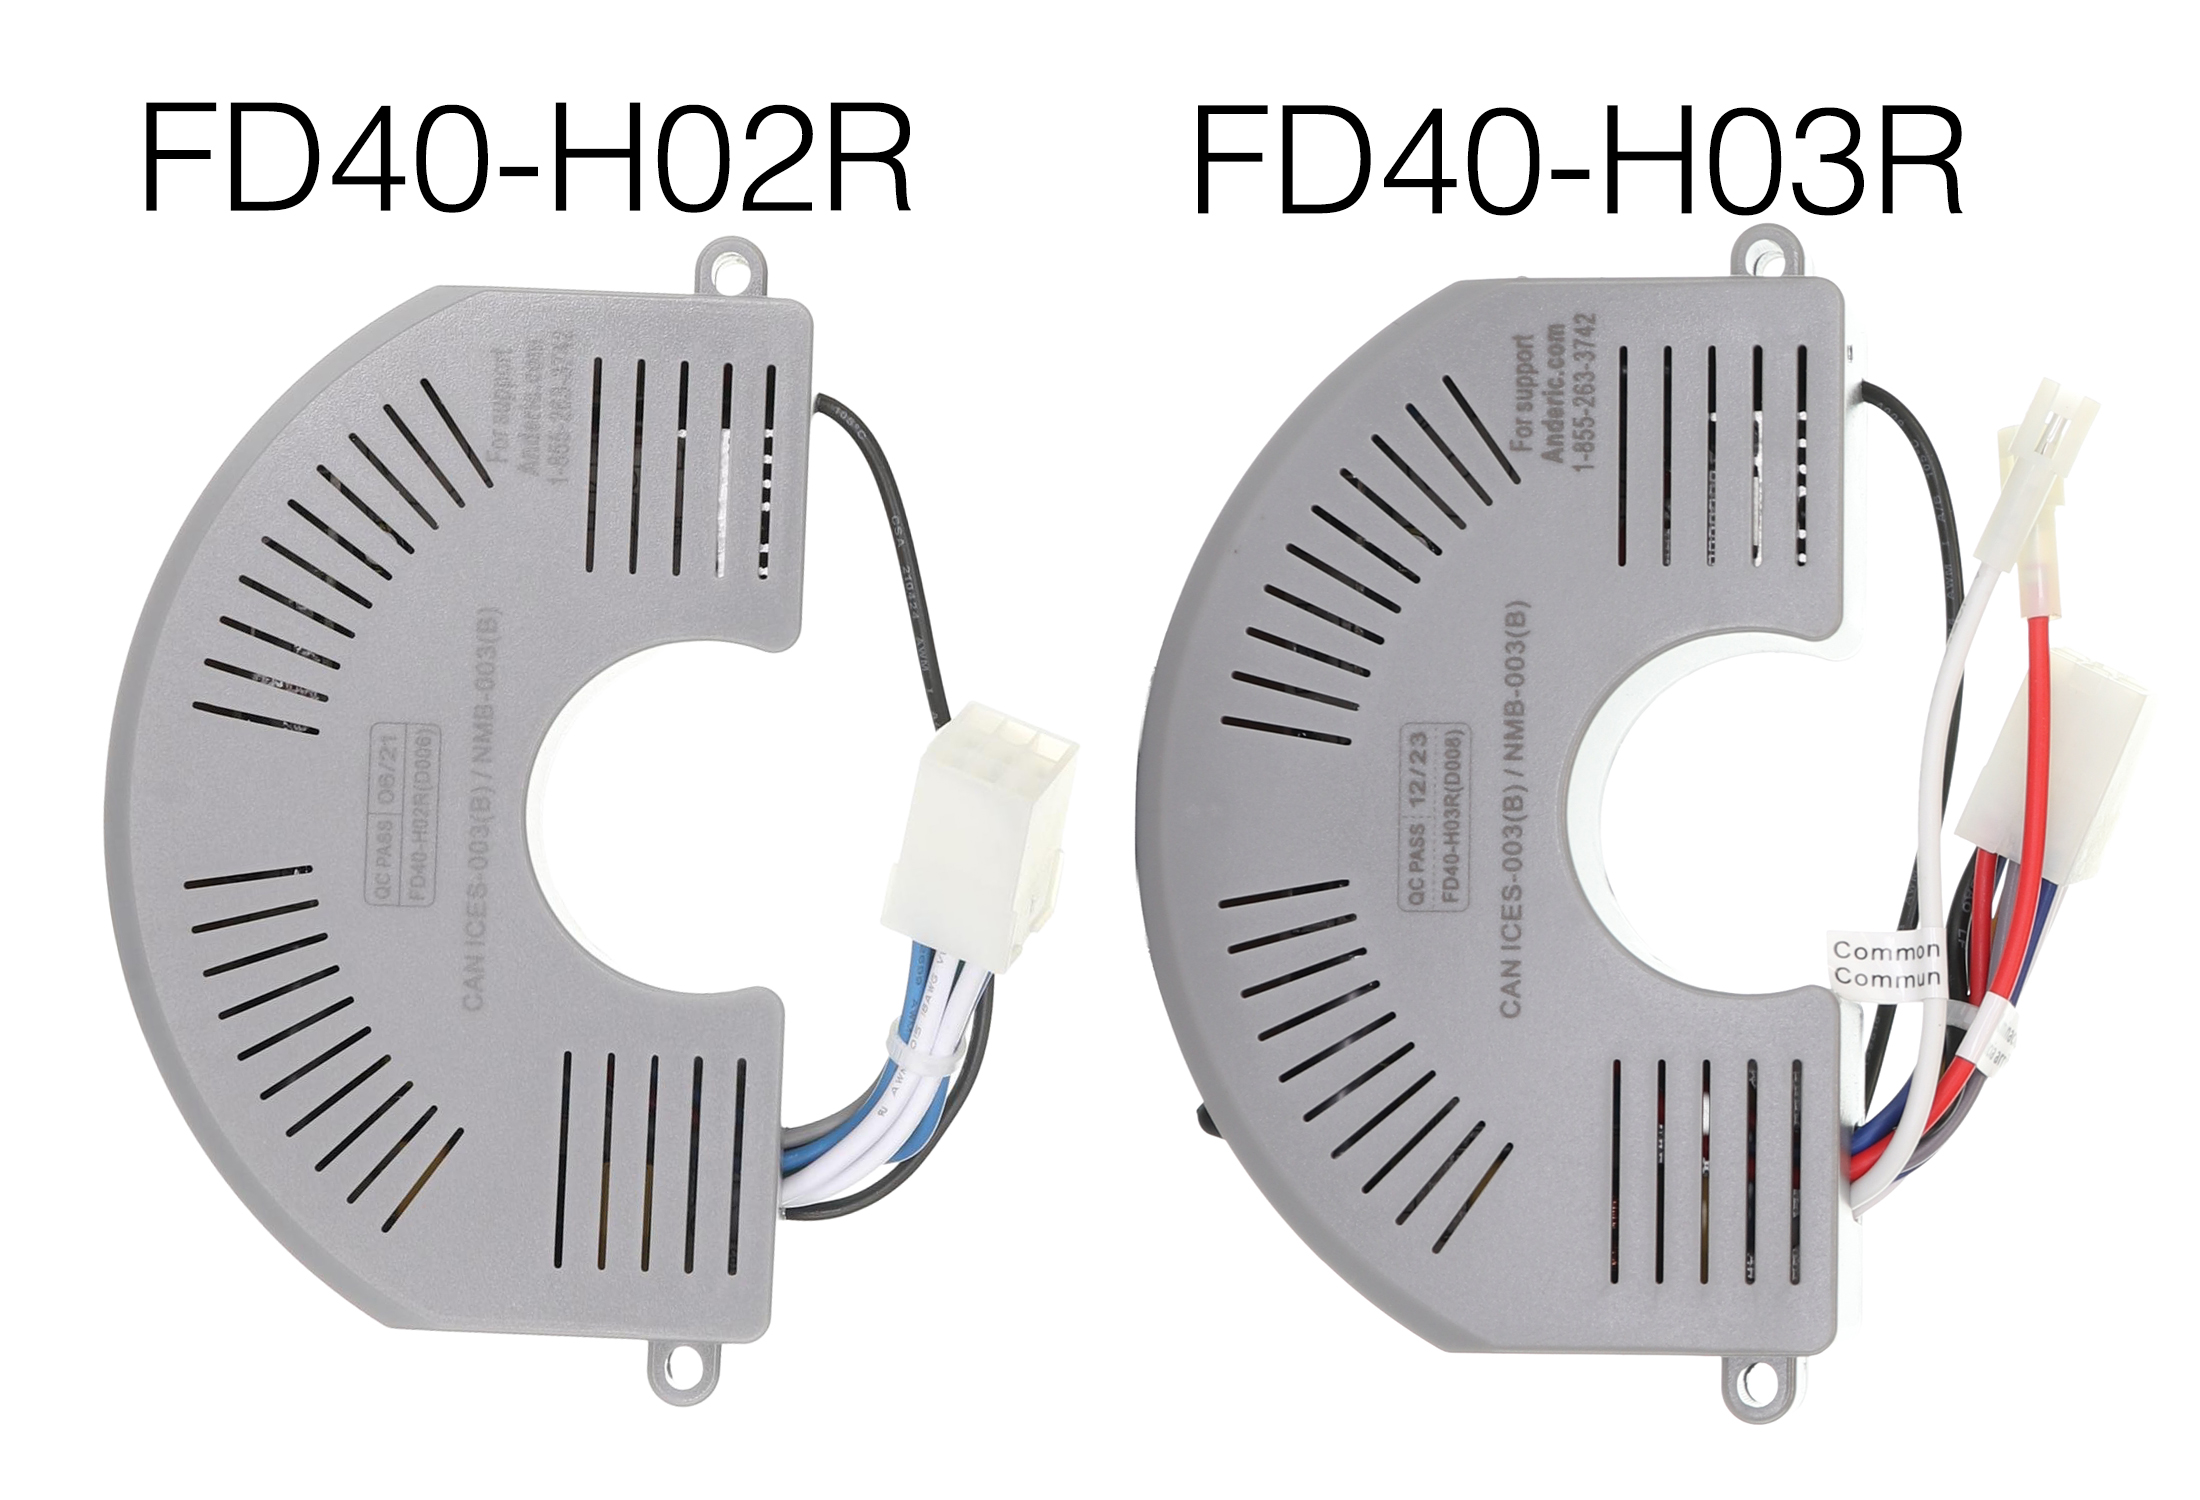
The Anderic FD40-H02R / FD30-H02R (click to view) DC receiver is specifically designed for use with select Harbor Breeze fans, including Mazon, Kingsbury, Wakefield, Portes, and Saratoga. This receiver ensures seamless integration with its simple PLUG, getting your fan up and running. This receiver is a downlight-only receiver.
Works with Remote Controls:
- ANDERIC RRTX012 (click to view)
- Harbor Breeze A25-TX012
The Anderic FD40-H03R (click to view) 6 Speed DC Ceiling Fan Receiver is specifically designed for use with select Harbor Breeze fans, including the Wakefield model. This receiver ensures seamless integration with it's simple PLUG to get your fan up and running.
Works with Remote Controls:
- ANDERIC RRTX012 (click to view)
- Harbor Breeze A25-TX012
- Harbor Breeze A25-TX025
Installing the Receiver
-
Before you begin, please turn OFF THE POWER to the Fan using either the light switch or the circuit breaker. You will need to take down the entire fan to access the receiver.
-
Disassemble the fan. For disassembly instructions, please refer to the fan's original Installation manual.
-
Locate the screws on top of the motor. Use the appropriate Phillips head screwdriver or Allen wrench to remove these screws. (SEE FIG 3.)
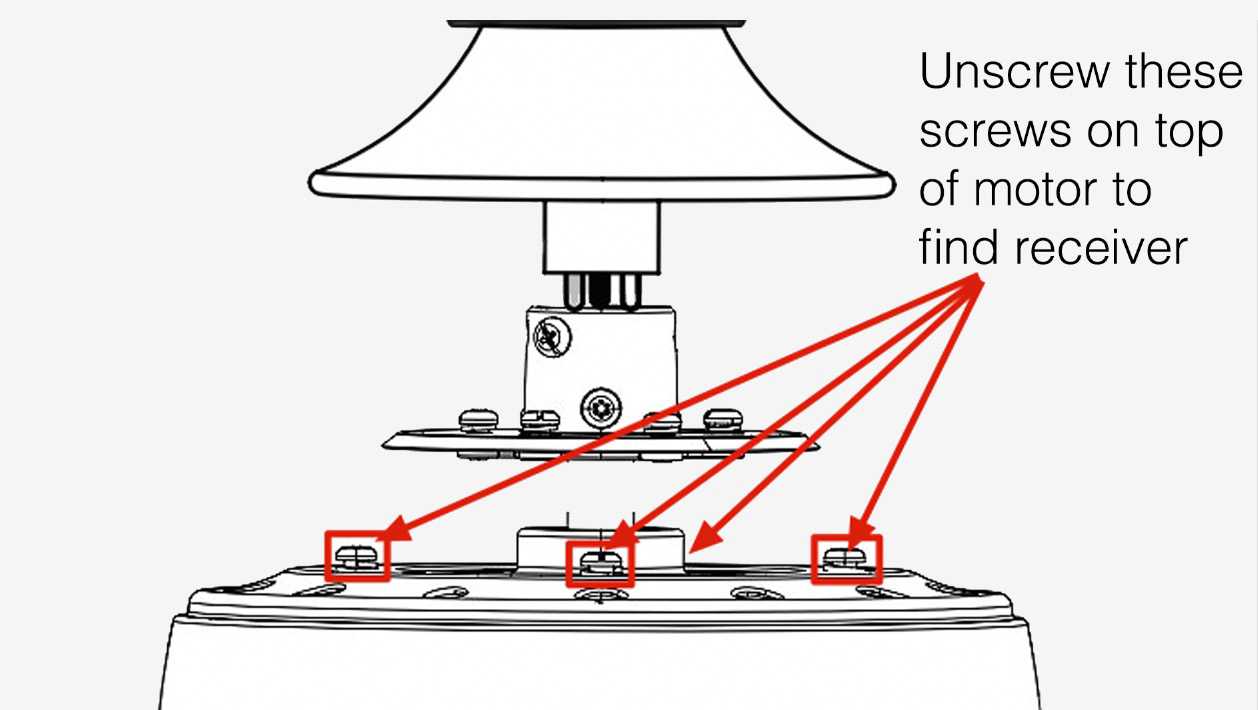
FIG 3. -
After removing the screws, lift the motor housing to gain access to the receiver.
-
Remove the two screws fixing the receiver to the motor assembly.
-
Unplug the wire harness and remove the receiver.
- Replace the old receiver with the new one and connect the wires.
- Connect the Wire harness
- If using an up-and-down light receiver, also connect and match the uplight wires (Red and White) to the corresponding fan wires. (Only applicable with FD40H-03R Receiver)
-
NOTE: FD40H-03R receiver WILL work for downlight-only fans. Do not connect the uplight wires to anything.
-
Attach the new receiver to the motor assembly with the 2 screws.
-
Push all wires together and replace the motor housing, aligning the holes for the housing screws.
-
Screw the housing back to the motor assembly.
-
Reassemble the fan to working order on the ceiling.
- Now try powering the fan back on and pairing your remote.
-
Within 30 seconds of restoring power, tap the “LEARN” key located inside the battery compartment. If learning is successful, the fan light will blink three times and turn on. (SEE FIG 1.)
-

If the fan or the remote doesn't work, see the troubleshooting section below. Also, try watching the YouTube video below.
TROUBLESHOOTING
Receivers and remote transmitters occasionally go bad. The fan's receiver will easily fail during power surges, lightning strikes, or faulty wiring. If the remote control or ceiling fan does not operate as expected, review the following guidelines:
Fan or Light Does Not Turn On
- Confirm that power to the fan is ON at the circuit breaker and/or wall switch.
- Verify that the light kit is properly installed and all wiring connections are secure.
-
Check that the bulb is functional and not burned out; replace with a new bulb or light kit if necessary.
Fan Speeds Do Not Operate Correctly
- Ensure the installed receiver is compatible with the ceiling fan.
- Verify that the remote control has fresh batteries and is compatible with the receiver (see the listed models).
-
Confirm all wiring connections between the receiver and fan are properly installed and secure.
Light Does Not Turn On or Dim Properly
- Ensure the light kit is correctly connected to the receiver.
-
Note that not all LED bulbs support dimming. For proper dimming functionality, use dimmable incandescent or compatible dimmable LED bulbs.
Intermittent Operation
- Turn power OFF and recheck all wiring connections, ensuring wire nuts are secure.
- Verify that the dip switch settings on the receiver and remote match exactly (if applicable).
- Confirm the remote is properly paired with the receiver; re-pair if necessary.
- Ensure other remotes in the home are set to different frequencies/settings, especially if multiple fans are installed.

The remote indicator light doesn't illuminate
- Confirm that the battery is not dead. Replace the battery with a brand new A23 (12V)
- Make sure the battery is installed correctly by matching the polarity. SEE FIG 1. The + side of the battery must be installed to the left.
The remote does not pair
- Confirm you have the correct model remote for your fan. Works with Remote Controls:
- ANDERIC RRTX012 (click to view)
- Harbor Breeze A25-TX012
- Harbor Breeze A25-TX025
- The receiver could be blown. If you have tried multiple remotes and nothing is pairing. Most likely, your receiver has gone bad. You will want to replace.
Notes about the Receivers
- The Anderic FD40-H03R receiver will directly replace the FD40-H02R and FD30-H02R Receivers. The FD40-H03R receiver has 2 extra wires that work for the UP-facing lights. If the fan doesn't have the UP-facing lights, then leave the two wires disconnected. The receiver should still be connected and work with your remotes.
⚠ Electrical Safety Warning
- Turn OFF the power at the circuit breaker before installing or servicing this wall control.
- Improper installation may result in electric shock, fire, or damage to the fan or electrical system.
- This wall control must be installed in accordance with local electrical codes and regulations.
If you are unsure about any part of the installation, or if the product does not operate correctly after installation, stop installation immediately and contact a licensed or certified electrician for assistance.
ANDERIC® is not responsible for damage or injury resulting from improper installation or misuse of this product.