RC-GZ1 | Anderic Remote Control for Roku Streaming Player and TV User Guide
Confirm your model
This article applies to the RC-GZ1, pictured on the left below; however, if the number located in the battery compartment reads RC-FA5, pictured on the right below. Please go here for instructions.

Compatibility
This remote works with most Roku devices, including Roku Streaming Sticks, Roku Streaming Players, Roku-enabled TVs, and Roku sound bars. This remote replaces many remotes, including but not limited to the RC-AL2, RC-AL7, RC-EL1, RC-EL2, RC-FA1, RC-GZ1, RC-A1R, RC-ALIR, and RC-81. However, the App Shortcut keys may vary.
Pairing your remote by using an existing, already-paired remote/mobile app
Please follow the steps below if you already have a paired remote or if you are using the Roku mobile app as a remote.
- Install two AAA batteries into the remote by removing the battery cover, inserting batteries, matching polarity, and replacing the battery cover.
- Using your existing remote (or the built-in remote from the Roku mobile app), return to the home screen by clicking the key. The home screen should appear on your TV.
- Click “Settings” from the menu.
- Click “Remotes & devices.”
- Click “Add devices.”
- Click “Remote,” then “Continue.”
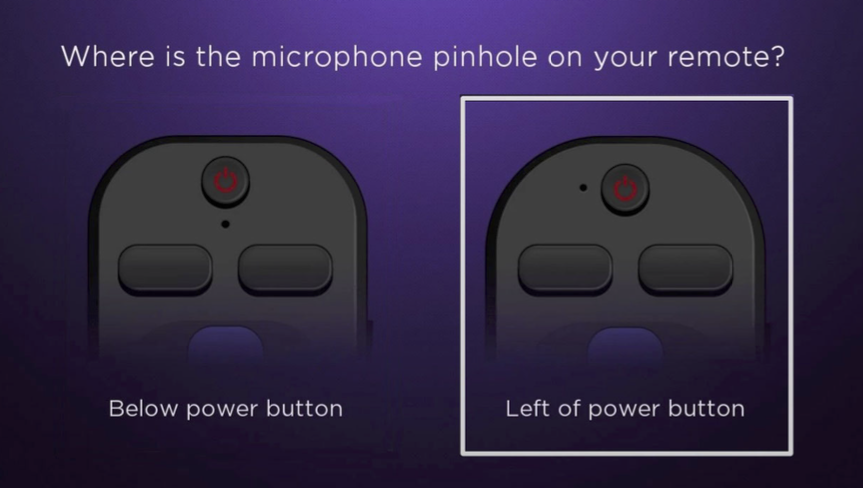
- Select the option on the right labeled “Left of power button.”
- Then, follow the onscreen setup to complete the pairing.
Simple pairing without using an existing remote
- Install two AAA batteries into the remote by removing the battery cover, inserting baHeries, matching polarity, and replacing the battery cover.
- The indicator light on the front of the remote will flash to indicate that the remote has entered pairing mode. Suppose the indicator light does not flash; press and hold both the [BACK] and [HOME] buttons for 5 seconds. When the indicator light begins flashing, release the keys.
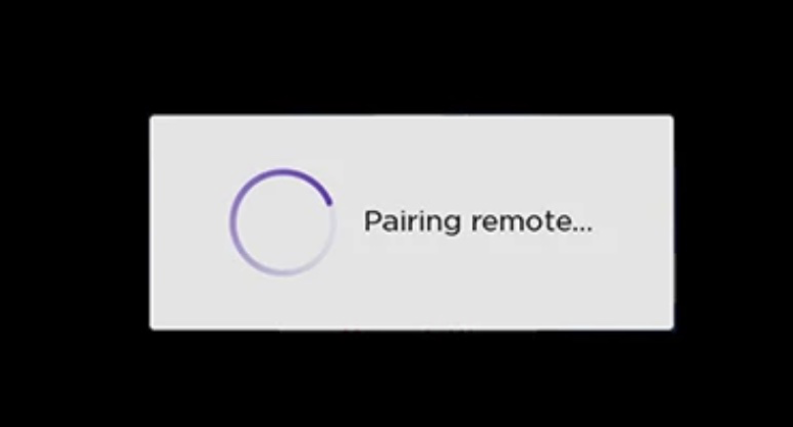
3. With your Roku unit powered on, your Roku should detect your remote, begin the pairing process, and display the following message on the screen.
If the above doesn’t work. Do the following
1. Power off your Roku by unplugging it from the power source.
2. Install batteries in the remote, then enter pairing mode by pressing and holding both the [BACK] and [HOME] buttons for 5 seconds until the indicator light on the front flashes, and release the keys.
3. Return power to your Roku device while the remote is in pairing mode. Wait for the Roku to boot up and return to the home screen, then you should see the onscreen pairing dialogue.
Notes about pairing your voice remote with your Roku device
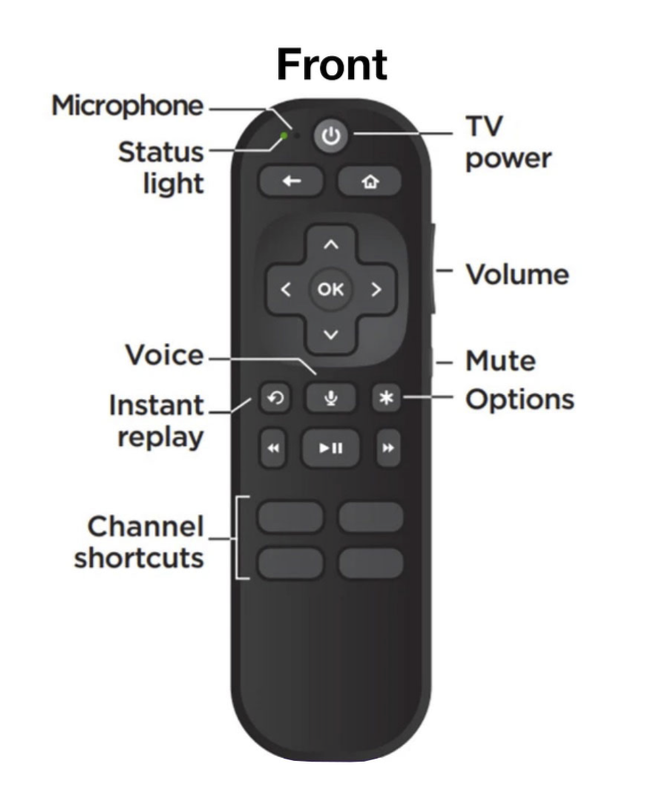
Unlike many other models, this remote does not have a pairing button (usually located in the battery compartment). Instead, to enter pairing, simply press and hold both the [BACK] and [HOME] buttons on the front of your voice remote for 5 seconds, and the indicator light will begin to flash.
Are you still having trouble pairing?
Software update notice
Before programming the new voice remote, please ensure your device’s software is on the latest version. To check if your unit needs an update, follow the steps below using an already paired remote or via the Roku mobile app:
Software update:
- Return to the main menu by pressing the Home key.
- Click “Settings.”
- Click “System.”
- Click “Software update.”
5. Click “Check now.”
6. If updates are required, your system will initiate an update.
Use the Roku Mobile App
If the above steps do not work, download the Roku mobile app from your phone’s app store. After you set up your Roku mobile app, using the built-in remote from the app, follow the instructions above for “Pairing your remote (by using an existing, already-paired remote/mobile app).”
Note: The RCGZ1 remote does not have the lost remote finder, headphone listening, or personal/programmable shortcut keys. If you require these features, please see the Roku Voice Remote Pro.