FAN28R, FAN28RUD, FAN28RT | Anderic Ceiling Fan Remote Control Receiver User Guide
This is a user guide for the following receivers
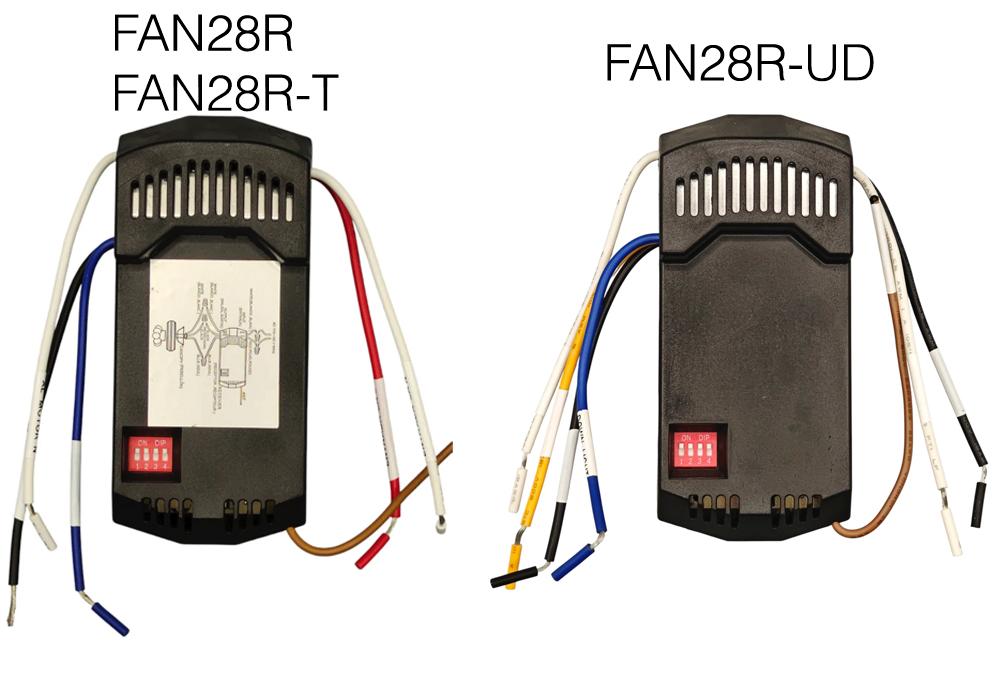
- ANDERIC FAN28R Ceiling Fan Remote control receiver for Hampton Bay
- This receiver works with the following remote controls: FAN-HD, UC7078T, RR7079T, RR7216T
- Features: Down light on/off/dimming, fan speeds: off, high, medium, low.
- ANDERIC FAN28RT with Thermostatic Ceiling fan remote control receiver.
- This receiver works with the following remote controls: FAN9T
- Features: Thermostatic, with down light on/off/dimming and fan speeds: off, high, medium, low.
- ANDERIC FAN28R-UD UP & Down light Ceiling Fan Remote control receiver
- This receiver is compatible with the following remote controls: FAN-HD with up and down lights, and RR7078TUDL.
- Features: Up light controls, Down light on/off/dimming, and fan speeds: off, high, medium, low.
Pairing the remote
- This remote controller is designed to separately control your ceiling fan speed and light brightness.
- There are four buttons (HI, MED, LOW, OFF) to control the speed of the fan and off.
- The light dimmer button will control the light brightness from off to dim.
- The red indicator on the transmitter will light when one of the five buttons is pressed.
Installing the FAN28R & FAN28RT Receiver
WARNING: High voltage! Household electrical power can cause serious injury or death. Disconnect the electrical power source to the ceiling fan by removing the fuse or switching off the circuit breaker.
- Remove the ceiling fan canopy from the mounting bracket.
- Disconnect the existing wiring between the ceiling fan and the supply at the electrical junction box. If you already have a receiver installation (and are replacing it), please disconnect all wires.
- Lay the black antenna wire on top of the receiver and put the receiver in the mounting bracket (Fig. C).
- Make the following connections using the wire nuts supplied (Fig. D).
| Connect | To |
| Green Fan wire | Bare supply wire |
| Black receiver wire (AC IN L) | Black supply wire |
| White receiver wire (AC IN N) | White supply wire |
| White receiver wire (TO MOTOR N) | White fan wire |
| Black receiver wire (TO MOTOR L) | Black fan wire |
| Blue receiver wire (FOR LIGHT) | Blue lights wire |
| Yellow wire (FAN28R-UDL) (FOR UP LIGHT) | Orange/red wire |
- Push all connected wires up into the junction box.
- Reinstall the canopy on the mounting bracket.
- Restore the electrical power.
Installing the FAN28R-UD Receiver
WARNING: High voltage! Household electrical power can cause serious injury or death. Disconnect the electrical power source to the ceiling fan by removing the fuse or switching off the circuit breaker.
- Remove the ceiling fan canopy from the mounting bracket.
- Disconnect the existing wiring between the ceiling fan and supply at the electrical junction box. If you already have a receiver installation (and are replacing it), please disconnect all wires.
- Lay the black antenna wire on top of the receiver and put the receiver in the mounting bracket.
- Make the following connections using the wire nuts supplied.
| Connect | To |
| Black receiver wire (AC IN L) | Black Supply Wire |
| White receiver wire (AC IN N) | White Supply Wire |
| White receiver wire (TO MOTOR N) | White Fan Wire |
| Black receiver wire (TO MOTOR L) | Black Fan Wire |
| Blue receiver wire (FOR DOWN LIGHT) | Blue Fan Wire |
| Red receiver wire (FOR UPPER LIGHT) | Red Fan Wire |
- Push all connected wires up into the junction box.
- Reinstall the canopy on the mounting bracket.
- Restore the electrical power.
- Pair the remote (sold separately)